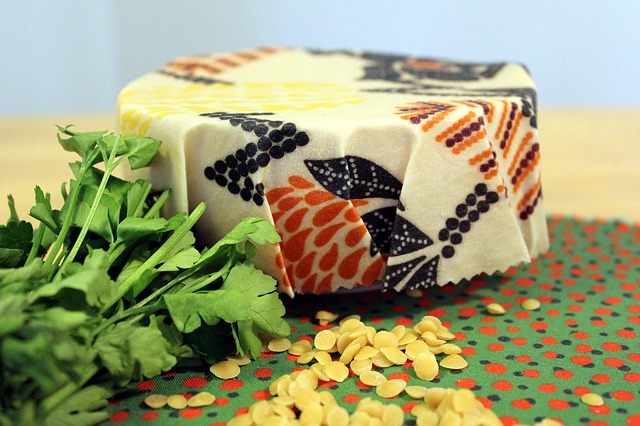
Beeswax Food Wraps
Beeswax food wraps are becoming a popular way to store food instead of using throw away plastic bags or wrap. They’re perfect for storing cheese, as it should be allowed to “breathe” instead of being kept in an air tight container where it tends to grow mould. They can also be used for kids’ packed lunches, covering food in the refrigerator and just about anywhere you’d typically use plastic wrap for.
Beeswax wraps last a long time if used properly and can be re-waxed should they start wearing out a bit. This recipe will make 6 wraps measuring 30x30cm and it’s a lot of fun to do, not to mention, environmentally friendly.
You will need:
- 100g Beeswax pellets
- 20g Pine Resin
- 3 Teaspoons (15ml) Jojoba oil
- 6 squares of 100% cotton, prewashed, dried and cut into 30x30cm squares (use Pinking Shears if available to help stop fraying of the fabric). Old shirts or sheets work well
- 1 large and 1 small saucepan (or for a microwave 1 oven proof bowl)
- Tinfoil or baking paper
- Baking sheet
- Old clean paintbrush (or a cheap new one)
- Paper towels for clean-up
- Grater or knife
- Mortar & pestle
- Tongs
Method:
- Preheat the oven to 80-100 degrees Celsius (any higher will burn the wax and set off the smoke alarm)
- Place a fabric piece on top of a foil or paper lined oven tray
- Cut or grate the beeswax into smaller pieces, and grind the pine rosin to powder with a mortar and pestle
- Melt both together in a microwavable bowl or over a double boiler (remember if you do not have access to a double boiler then a large saucepan partially filled with water with a smaller pot resting on some forks in the bottom of the larger pot will suffice)
- Once melted, add the Jojoba Oil and stir to combine
- Pour a little of the melted wax over the fabric and use your paintbrush to spread it evenly to the edges and work it into the weave
- Pop in the oven for a few minutes (this will help even it out)
- Take out of the oven to make sure it has soaked through to the back of the fabric. Caution – HOT – use tongs!! It should look darker and saturated with wax – add a little more wax and return to the oven if needed
- Use tongs to pick up the wrap and hang to cool. It only takes a couple of minutes to set
- Repeat steps 6-8 with the remaining fabric pieces
- Any leftover wax can be set and used for re-waxing at a later date
CLEANING TIP– wipe out your pots with paper towels before attempting to wash in hot soapy water.
Using your Beeswax Wrap
To use your beeswax wrap, drape the fabric over the top of the container or plate you want to seal and mould with the heat of your hands. Or wrap directly around food such as bread, cheese and snacks.
Always wash in cool soapy water and hang to dry.
Never use your wrap for wet food, meat or on hot food or plates. Do not use in the microwave or oven.
Wax coating should last around 6 to 12 months. You can place in a low oven on a lined oven tray to re-distribute the wax. It will eventually need a re-coat of wax. Just grate the remaining block of wax on top of the fabric on a lined oven tray and pop in the oven for a few minutes. Use your paintbrush to spread the wax evenly and hang to cool.
